How to build a snow cave
by Randy Gerke©
all photos by Randy Gerke©
The radio on my chest crackled to life: "Team one this is rescue base, we’re having mechanical difficulties with our helicopter and will be unable to reach you before dark. Do you copy?".
"Understood rescue base. I’ll be establishing a bivouac at the designated landing zone."
I stood for a moment and looked at the scene around me, thinking about the hot shower and warm bed I would not have tonight. It was now 3:00 PM in early February. I was located at 12,000 feet in the Rocky Mountains of Colorado, and the landing zone was about 10 miles from the nearest access road. The wind was picking up, and mid-level clouds were quickly beginning to obscure the low sun. The National Weather Service was also reporting a fast-moving system coming into the area sometime during the night. In two hours, it would be dark, and the temperature would plummet well below zero. In my mind, I surveyed the gear in my pack. "It's going to be a long night," I said to myself as I grabbed my avalanche shovel and went to work on my shelter.
For people involved in rescue work, this is not an uncommon scenario. Helicopters break down, the weather changes, and mission requirements place us at risk for an emergency bivouac each time we leave the security of the staging area. As rescuers, we often hyperfocus on helping others involved in an emergency, pouring all of our energy and resources into that objective. In the process, we become distracted from the most important mission, which is to protect ourselves.
Whenever preparing to venture into the backcountry, it’s critical that we’re proficient in the use of essential survival skills. This is especially true during the winter season, when one of the most vital skills is knowing how to construct a snow shelter.
Why Use Snow for a Shelter?
When snow accumulates on the ground, it mixes with air and traps it within the snowpack. This combination of snow and trapped air is what gives snow its insulative quality. Twelve inches of average snow has a similar insulating value to a 2"x4" wall filled with fiberglass insulation. As a natural insulator, snow ranks high among its competitors.
Constructing a Snow Cave
When choosing a site for a cave, avoid areas exposed to natural hazards such as avalanches. You would probably not choose to build a snow cave on a steep slope where avalanches form because of the difficulty of doing so, but even on gentler terrain, you should stay well away from the base of steep slopes where avalanche debris accumulates during a slide. Snow depth is an important consideration when choosing a location for a snow cave. A depth of 4 to 5 feet (120 to 150 cm) is helpful. Look for a drift or swale (a depression between slopes) near ridges or trees. Try to arrange the entrance to the cave so that it is on the leeward side (the side away from the wind) of a slope. Be sure to begin building your cave early while plenty of light remains. Construction becomes difficult in the dark.
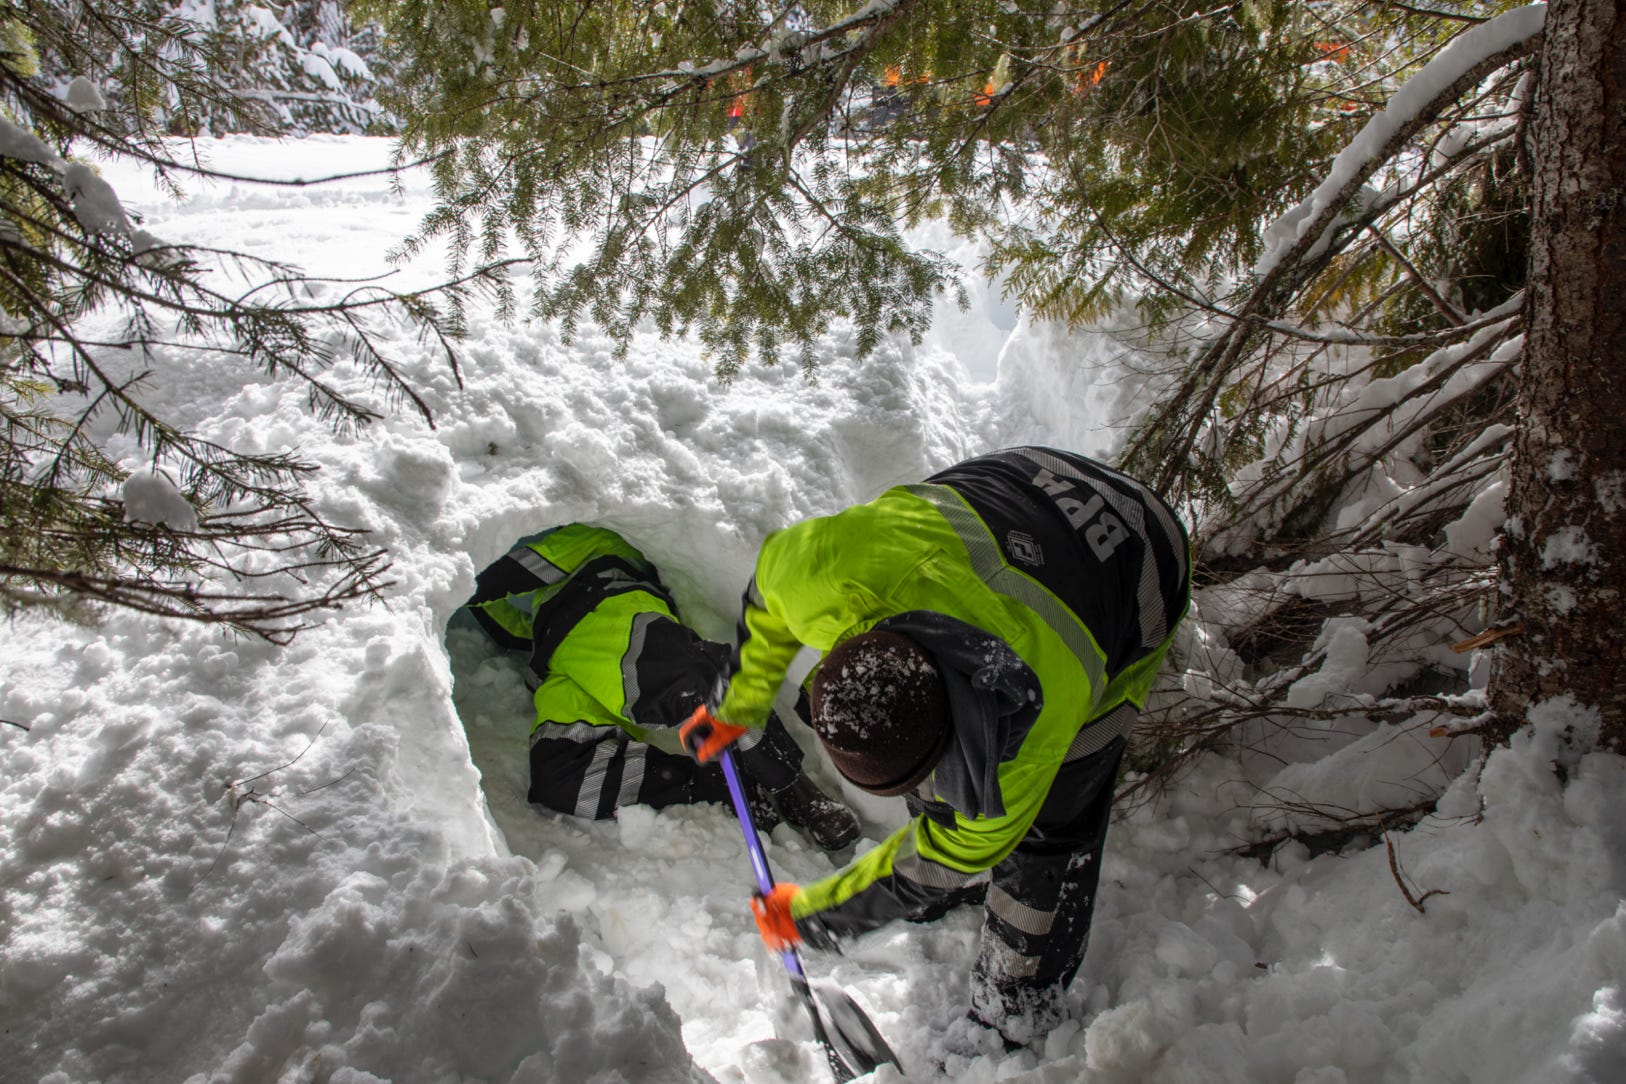
1. Prepare to dig. In cold conditions, moisture is a deadly enemy. Remember, dry is warm. While building snow shelters, you can become extremely wet. Before the actual digging begins, make sure that you're wearing the proper clothing, including layers and a breathable, waterproof outer shell. If proper clothing is not available, use special care to stay as dry as possible. A large scoop shovel is helpful for heavy digging, although smaller avalanche shovels also work well. In an emergency, a shovel may not be available, so use whatever you can improvise, including your gloved hands.
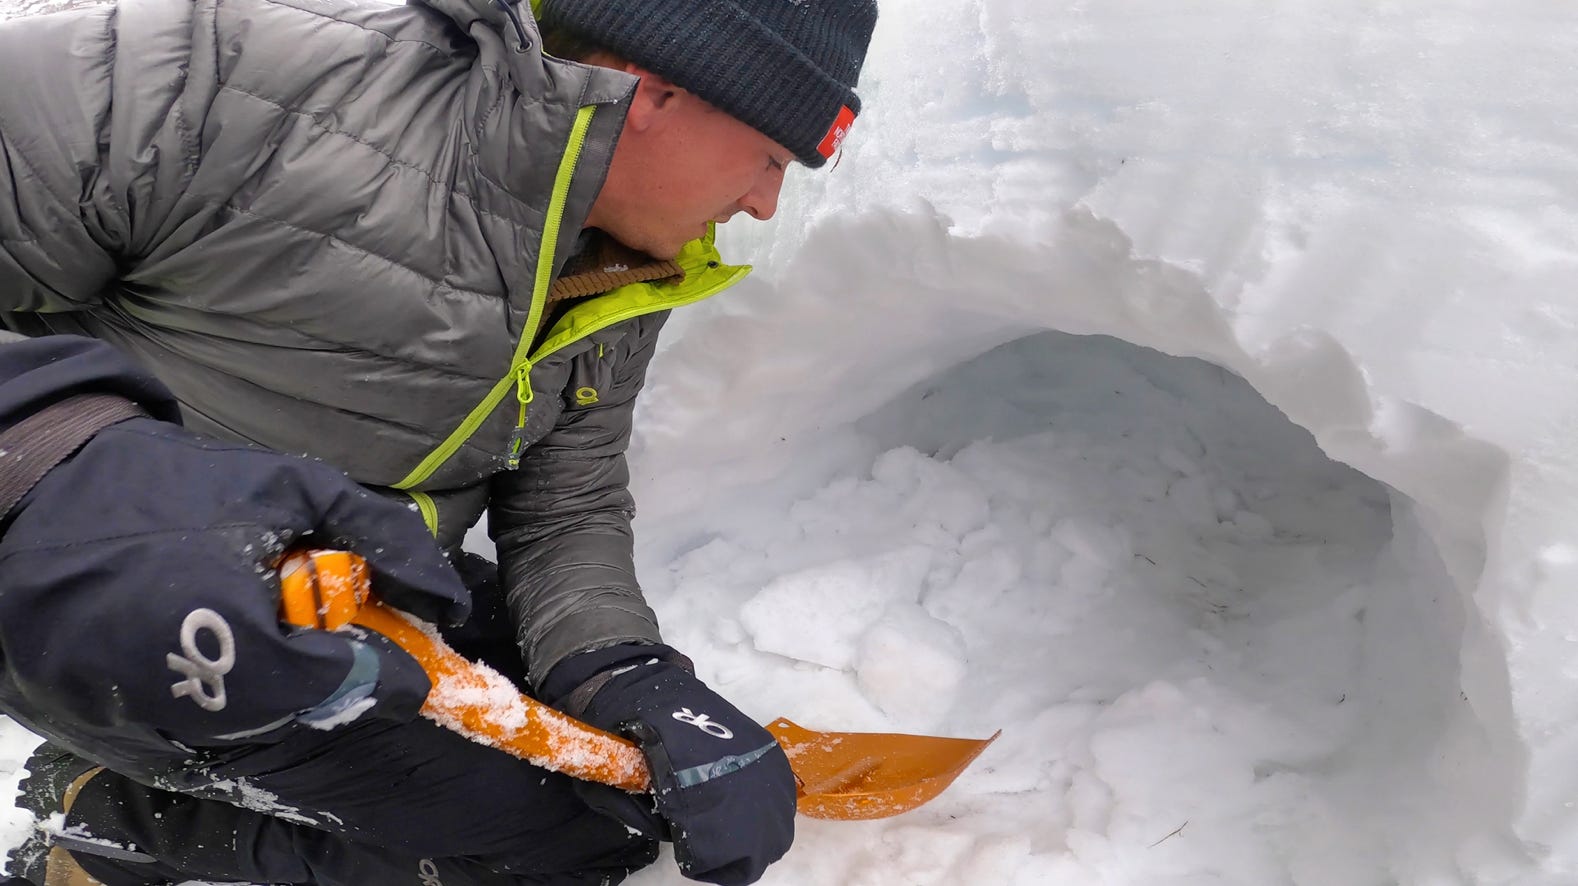
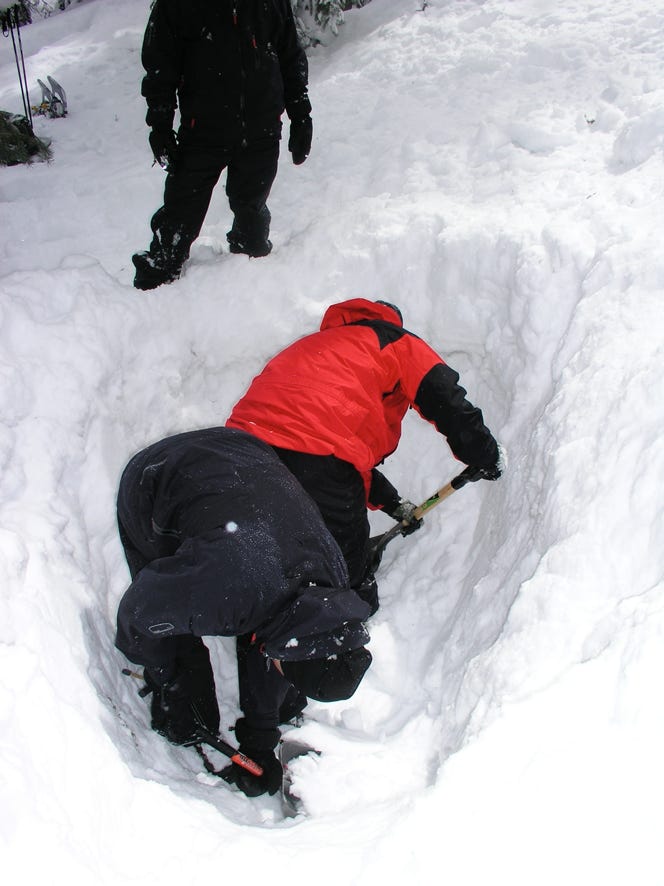
2. Dig a pit. Begin by digging a pit downward into the snow. The purpose of the pit is to get you deep enough into the snow so that you can then dig a cave in the snow to the side of the pit and allow adequate thickness (at least 12 inches, or 30 cm) on the top and sides. Make the pit wide enough to work in. As you dig, place the snow that you remove onto the roof area of the cave. If the snow is 4 or 5 feet (120 to 150 cm) deep, dig down until the pit is deep enough that the surface of the pile comes to about the top of your chest. If the snow is deeper, make the pit as deep as you are tall.
3. Prepare the entrance. The next step is to make the entrance. Do this by shaving the snow flat and vertical on the front face of the cave, where you will create the general entrance of the cave. At a point at about knee level, make the entrance by using the front edge of the shovel to make cuts in the snow in the shape of the entrance, which should be slightly wider than your body.
4. Tunnel in. Now begin tunneling in by digging at a slight upward angle from the entrance. Ideally, the cave end of the tunnel should be at least 12 inches (30 cm) above the entrance to help prevent warm air from escaping the shelter, but this may not be possible because of the lack of snow depth. Do your best to make the sleeping portion of the cave higher than the entrance. At the upward end of the tunnel, hollow out a space as large as your body. Moving the snow becomes a major task at this point. Use the shovel in front of your body to dig in. As you move forward, use your feet to move the snow out of the entrance. Now you are ready to begin shaping the cave.
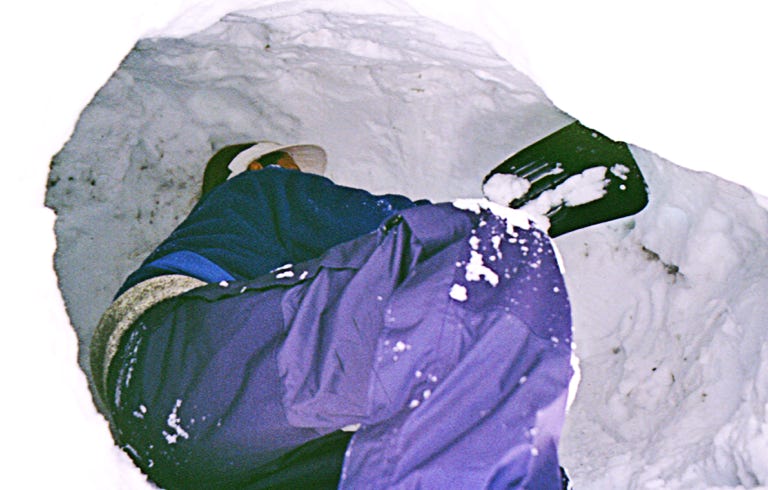
5. Shape the cave. The ceiling and the walls of the shelter should be dome-shaped and smooth, and the space should be large enough to sit up in. Try to eliminate any sharp edges or ridges on the walls and ceiling of the cave. The temperature in a snow cave commonly rises above the freezing mark, which creates snowmelt. If the ceiling and walls of the cave are domed and smooth, the water droplets will run down to the edges. On the other hand, water droplets will gather at ridges and edges and fall to the floor from those locations. If drips do occur, smooth those spots with a tool or your hand.
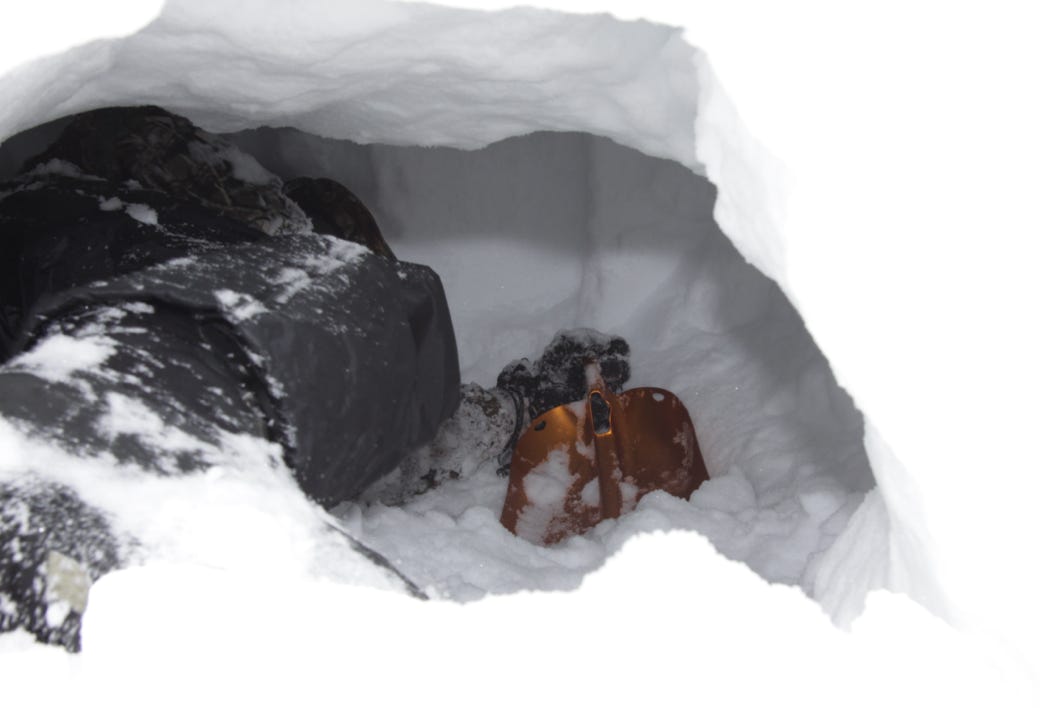
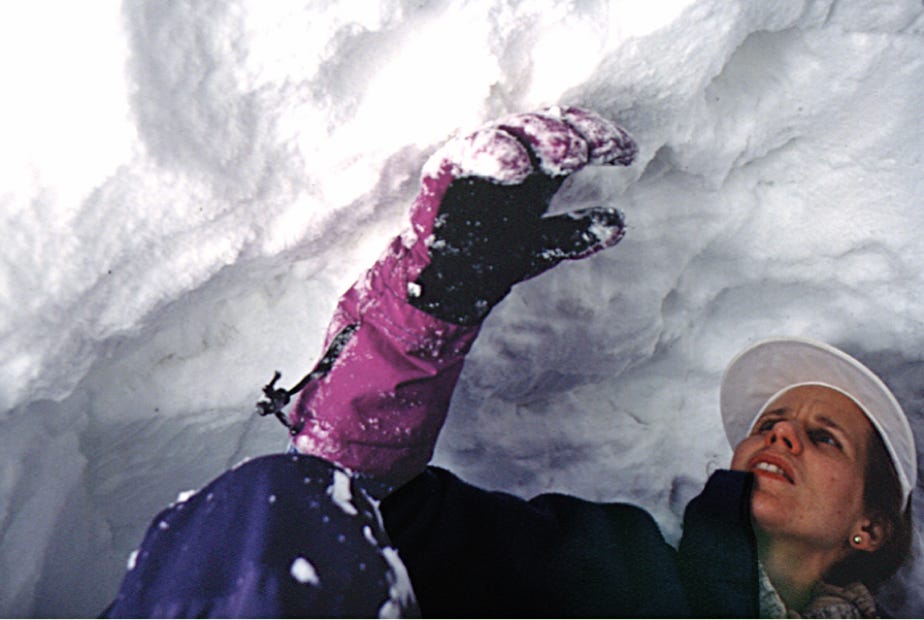
6. Create a ventilation hole. Another necessary feature is a ventilation hole to release the carbon dioxide produced by your breathing and the carbon monoxide produced by using a candle in the cave. Never build a fire in a snow cave because fire produces so much heat that it melts the snow and uses most of the available air, creating a carbon monoxide hazard. With a stick or other object, make a hole about 2 inches (5 cm) in diameter in the top of the cave. Check the vent hole at regular intervals to be sure that it does not become clogged. A convenient way to do this is to insert a small stick or other object into the hole. The stick should be only half the diameter of the vent hole. Leave the stick in place and occasionally push it up and down.
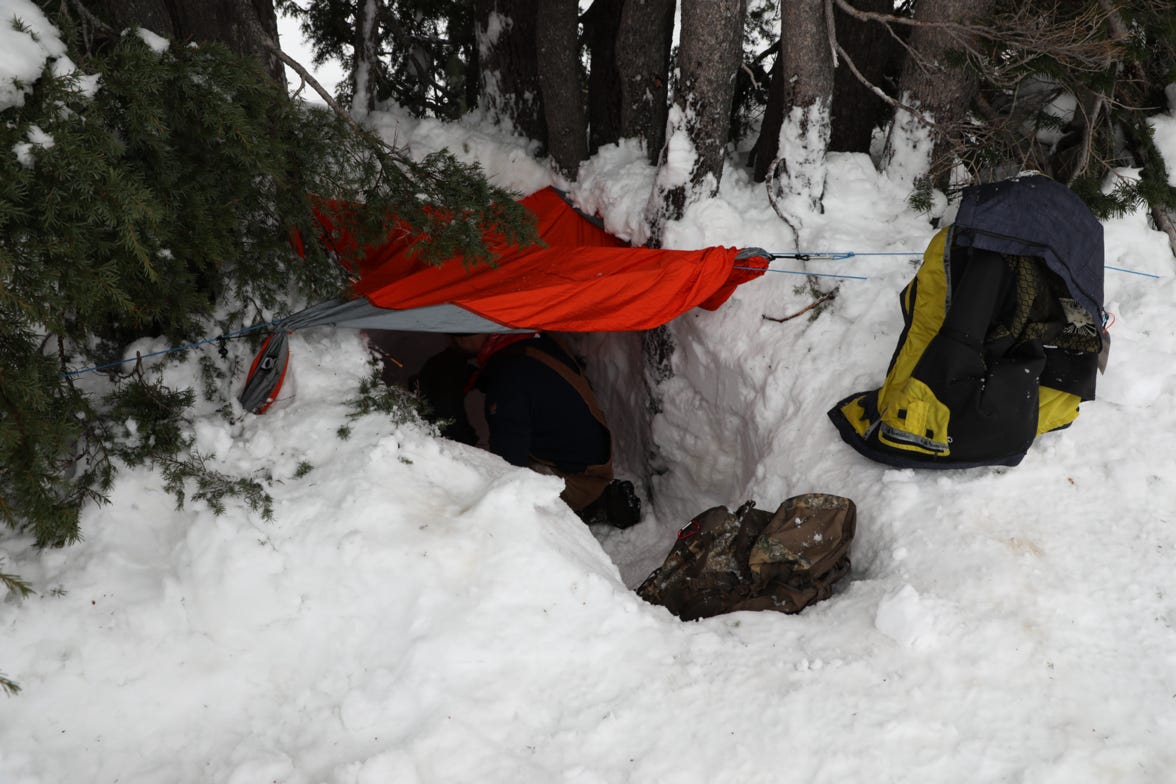
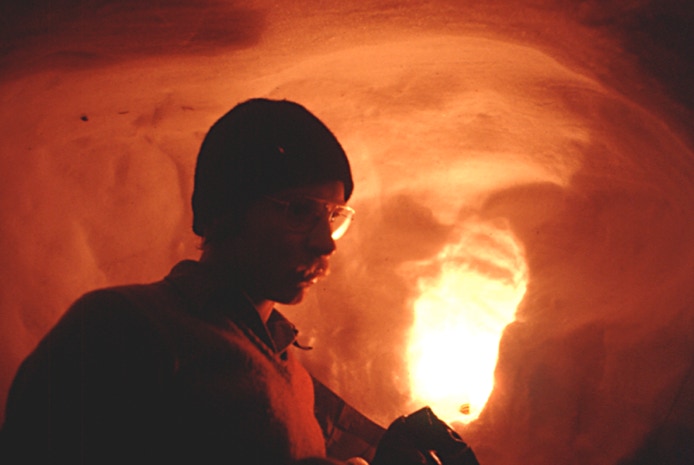
7. Add platforms and shelves. An elevated sleeping platform is a feature that allows you to be nearer the warmer air in the upper part of the cave. Create platforms and shelves for gear and equipment by placing and compacting snow in the desired locations. You can also make a shelf for a candle. One lighted candle can increase the air temperature in a small cave by as much as 20 degrees Fahrenheit (9 degrees Celsius). You can block the entrance to the cave with a snow block or other piece of gear to reduce air movement and increase the temperature inside.
On occasion, during the construction of a snow cave, especially in poor snow conditions, a collapse can occur. A good practice is to build caves in teams of two. During construction, one person should always remain outside. In case of a collapse, the person outside can then rescue the person digging. Rarely does a snow cave collapse after construction, especially after the temperature drops at night. Cold temperatures tend to increase the overall strength of the shelter. The ceiling of a snow cave can sink as much as 2 inches (5 cm) per day because of the normal settling of the snowpack. During a heavy storm, settling can increase dramatically. Always keep your shovel or digging device next to you in a snow cave in case a collapse does occur.
Other Types of Snow Shelters
Snow conditions vary depending on elevation and regional climate and weather conditions. You may find yourself in an area that doesn’t have enough snow depth to build a typical snow cave. There are 2 alternative snow shelters that utilize the insulating properties of snow that should be considered in these less-than-ideal circumstances. They are the snow trench and the quinzee.
Building a Quinzee
The origin of the word quinzee is Athabaskan, which is a large family of indigenous languages of North America. The quinzee shelter has its roots in Canada but has been widely adopted in other areas as well.
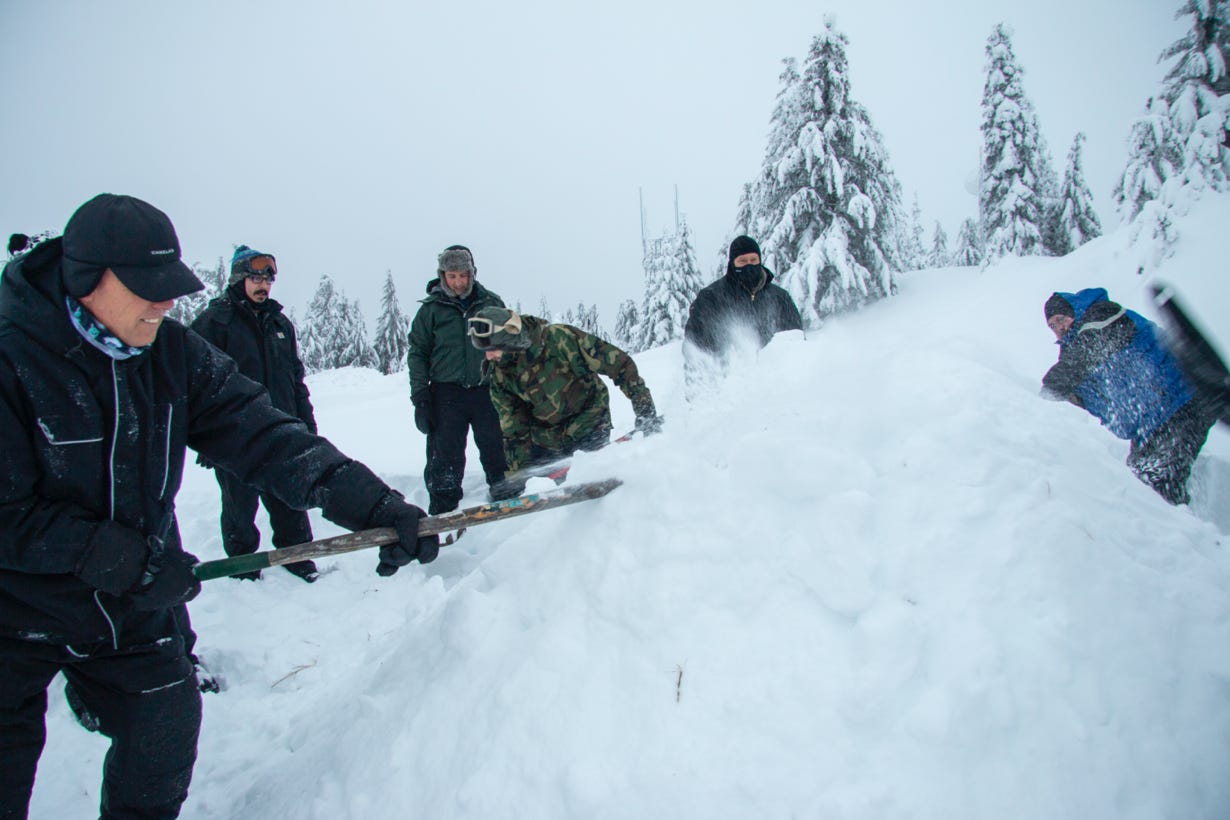
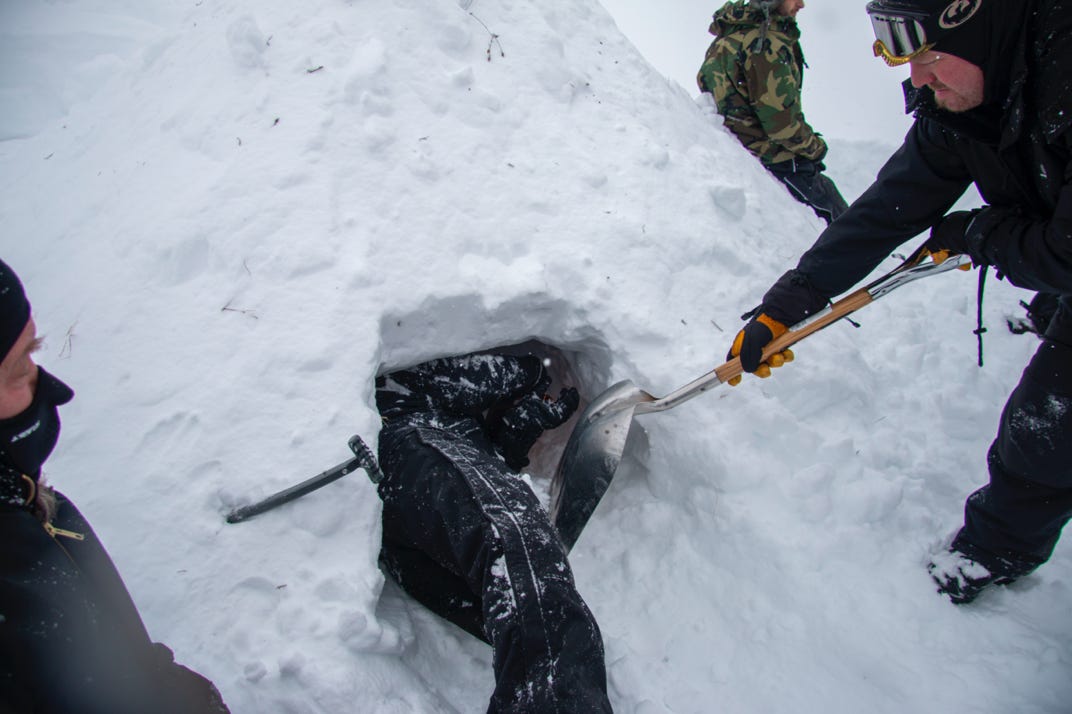
When there is insufficient snow depth to build a traditional snow cave, a quinzee can be made by forming the snow into a pile large enough to accommodate the number of people that the shelter will house. Form the snow pile by shoveling or moving snow onto a site that will provide a flat and stable base. Continue adding snow until a rounded pile is formed that is at least 4–5 feet deep and as long and wide as it needs to be for the number of people it will accommodate.
Occasionally use a shovel to slap the snow, breaking up clumps and air pockets in the snow. It’s better to start with more snow than you think you might need. Avoid forming a peak at the top of the pile. It should appear as a round mound of snow. The newly formed pile needs to be left undisturbed for at least an hour before any digging is attempted. This time allows the snow crystals to begin to bind together (sinter), which gives the snow shelter its strength and stability. This binding time varies depending on the type of snow, the moisture content, and the air temperature.
It’s possible that in some conditions, such as granular or corn snow, the snow crystals will require a longer time to form this bond, and in some cases they will not form one at all. In these situations, other types of shelters need to be considered. When using this method, smaller shelters will be easier to build. If there is a large number in a group, it’s more effective to build several smaller shelters.
When the snow pile is ready, the digging process is the same as digging and shaping a snow cave.
Building a Snow Trench
A snow trench, which is simpler and less time-consuming to build than a snow cave, is extremely effective when constructed properly. Snow trenches work well where the snow is not deep or when time is a consideration. Besides requiring much less time to build than a snow cave, a snow trench greatly reduces the possibility of getting wet, an important consideration for a person without proper clothing.
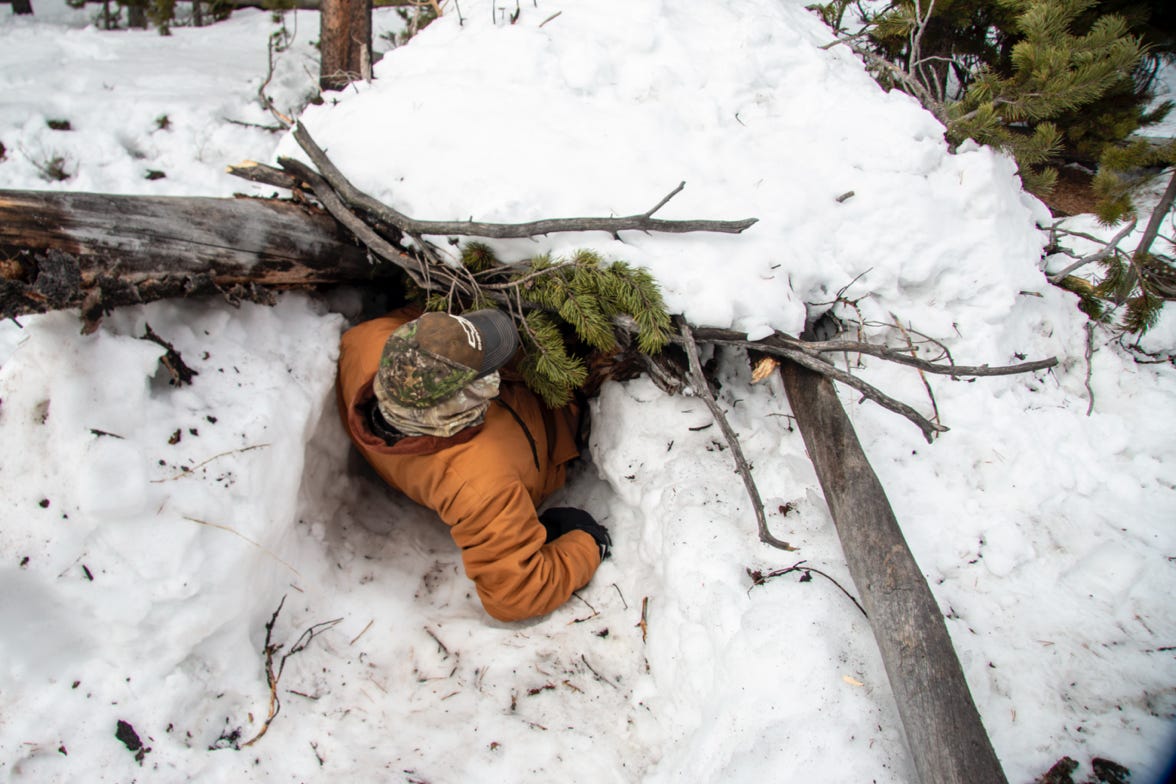
1. Dig a trench. Construct this shelter by creating a trench about 3 feet (90cm) deep. The trench should be just long enough to accommodate the tallest person in the group. The size of the group lying side by side determines the width. As with other shelters, keep the entrance to the shelter small. Steps cut into the snow at the entrance of the shelter work well. In an emergency, the trench can be used with no further modification. As is, the trench will break the wind and provide a small degree of insulation.
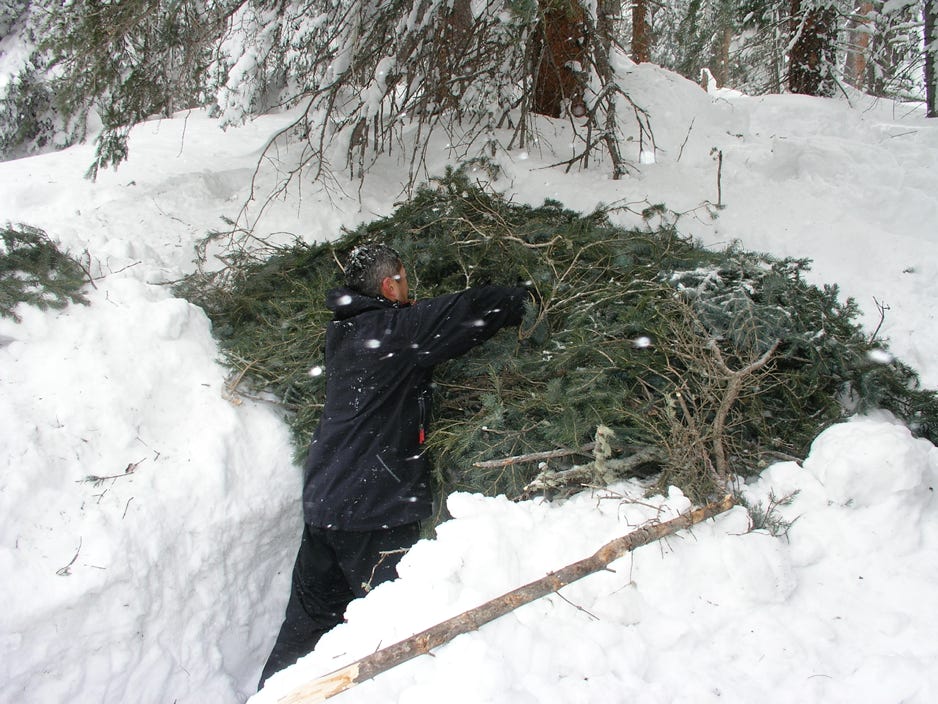
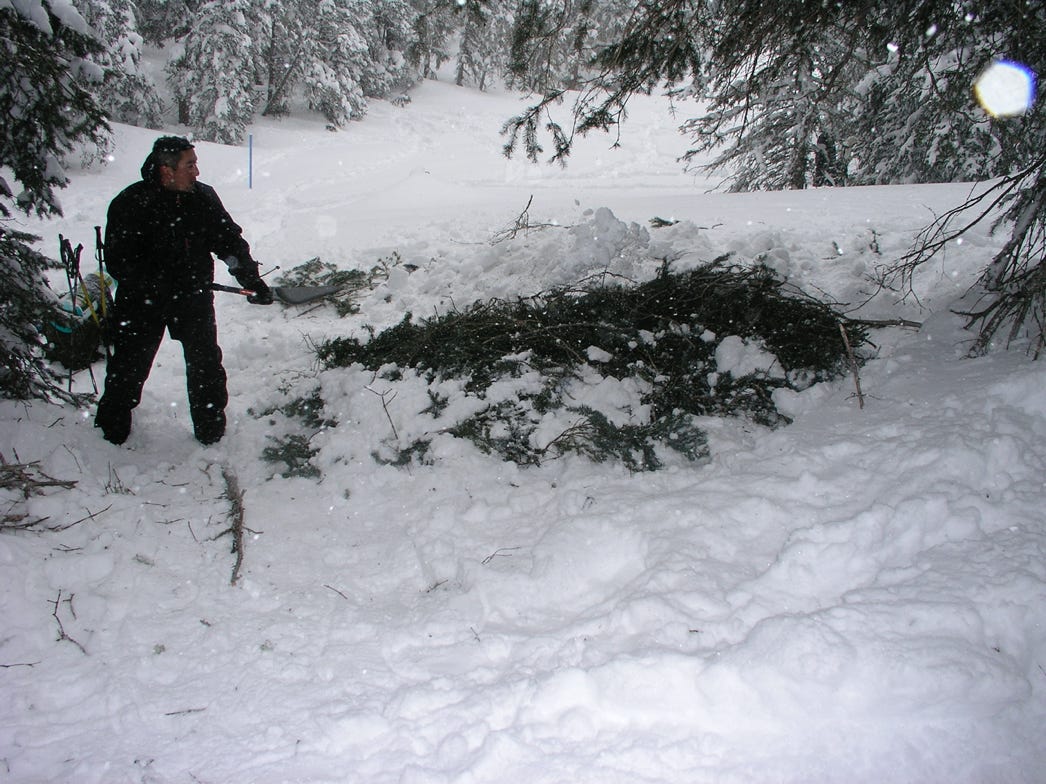
2. Add a roof. To increase the effectiveness of the snow trench, start by laying larger sticks across the width of the opening to create the main supporting members. If the trench is wide, additional vertical sticks from floor to roof may be needed for support. Then add smaller sticks until the roof is well covered. Placing a thatch of pine boughs, forest debris, or a sheet of plastic as a top layer is the final step in building the roof.
3. Add snow insulation. The next step is to place a layer of snow 12 inches (30 cm) deep on top of the roof of sticks. The snow will add a great deal of insulation to the snow trench.
4. Add heat. As in snow caves, you can light a candle in a snow trench to add heat. Be sure to provide a vent hole in the roof for fresh air.
The temperatures may drop and the storms rage, but if you follow these simple steps and carry basic emergency gear, you can be safe and secure in your home in the snow.


Randy Gerke is an author and the founder of Enviro-Tech International. He’s been teaching wilderness survival and safety skills to his clients for more than 40 years. He lives in southwestern Colorado where he’s actively involved in a variety of outdoor pursuits.